Remote Desktop Connection (RDC AKA RDP) allows user to remotely connect to a server. Unlike SSH access, user can manage files and folders through Graphical User Interface (GUI). This guide will help you to set up a RDP on your Ubuntu VPS or Dedicated server.
Update: Ubuntu 16.04 Remote Desktop Tutorial
GUI will use a lot of RAM on your server. So make sure you have at least 1GB RAM before you start. If you’re planning to host a website on your VPS, it’s not recommended to install GUI. SSH will save you lots of memory. Think about it before you continue.
Prepare Ubuntu Server for Graphical User Interface
Let’s get rid of unwanted packages & services. If you’re not planning to host a website on your server, you don’t need Apache web server, Bind DNS server & samba server. They are pre-installed on VPS. Removing those will free some RAM. Connect to your VPS using PuTTY and give following command to remove apache2, bind9 & Samba servers.
apt-get purge apache2* bind9* samba*
If you get an error like E: Couldn’t find package apache2*, that means package is not installed on your server. You can ignore that. Now it’s good time to upgrade existing packages your VPS. Below code will do it
apt-get update
apt-get upgrade
We’ll need a text editor to edit VNC configuration files shortly. So install Nano text editor for Ubuntu.
apt-get install nano
Install Ubuntu Desktop GUI, Configure Gnome and XWindows
Now you VPS is ready for Ubuntu-desktop. Following command will install it on your VPS.
apt-get install ubuntu-desktop
This will take some time. And during install you need to provide some information. Like Country, Language, etc”¦ Give information accordingly or leave defaults (hit enter). Next we need to configure Gnome & XWindows. Give following commands on CLI.
service lightdm start
dpkg-reconfigure xserver-xorg
Install & Configure TightVNC server on Ubuntu
We’ll need Remote Desktop Server on VPS to connect to it from our Windows computer. I choose TightVNC. There are others like RealVNC & FreeNX but TightVNC setup is easier & quicker than those. Following command will install TightVNC server Ubuntu.
apt-get install tightvncserver
Now configure RDS VNC server and create password. Run following command
vncserver :1 -geometry 1024x768 -depth 16 -pixelformat rgb565
It’ll ask you from password to access VPS server GUI desktop. Make sure to use strong password within 8 characters limit. After entering & verifying password, you will be asked for additional password for limited (Read Only) access. Answer yes (y) if you need one.
After entering passwords, check whether the VNC server is running or not. Issue following command,
ps aux | grep Xtightvnc
The above code will return something like Xtightvnc :1 -desktop X followed by some other codes. If you can see that, VNC server is successfully installed & running on your VPS. But by default, VNC server does not use the Gnome window manager. To make VNC server to use Gnome window manager, we should make some changes to the configuration files.
Open VNC configuration file with Nano text editor
nano ~/.vnc/xstartup
Look carefully at the file. If you find x-window-manager & uncommented, then comment-out it by adding a # at the beginning of file. Then append with this.
gnome-session &
Finale file will look something like this.
#!/bin/sh

xrdb $HOME/.Xresources
xsetroot -solid grey
#x-terminal-emulator -geometry 80x24+10+10 -ls -title "$VNCDESKTOP Desktop" &
#x-window-manager &
# Fix to make GNOME work
export XKL_XMODMAP_DISABLE=1
/etc/X11/Xsession
gnome-session &
Click x to exit and then y to save changers.
Now we’ll setup SSH service server to run automatically on reboots. Give below command
update-rc.d ssh defaults
Reboot server
reboot
CLI will disconnect at this point. Reconnect to it after few seconds & fire-up VNC server. You need to do it on every reboot
vncserver :1 -geometry 1024x768 -depth 16 -pixelformat rgb565
Install TightVNC package on your computer
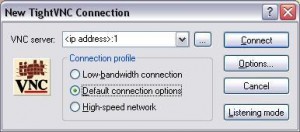
 Go to TightVNC download page, Download & install “Self-installing package for Windows’ on you PC. Run TightVNC Viewer and will see following dialogue box. On the field that asking for VNC Server, enter your VPS ip address followed by :1, Which the port VNC Server is running.
Bingo! You have successfully connected to your VPS server GUI desktop!

Perfect tutorial. Thank you.
Not working. Screenshot http://puu.sh/cEltW/604ea989aa.jpg
What’s your Ubuntu version?
Same for me.. I am using Ubuntu 14.04
Not working! Only grey screen!